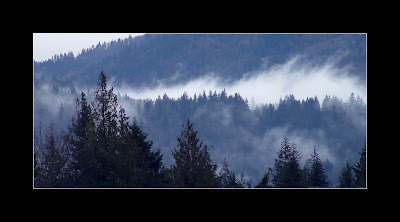
What I have done is taken 3 different pictures and combined them together to make one awesomely rad picture. The first one is of a picture of the Eastside of Seattle, Washington my friend took back in September.
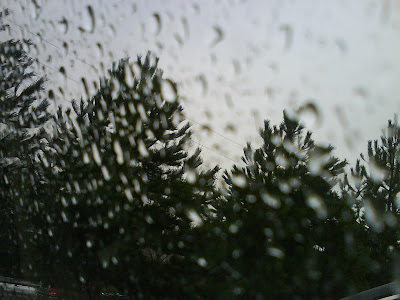
This next picture was taken by my camera phone over Christmas Break in Seattle sitting outside of Walgreens... only a weirdo like me would miss the rain so much that they'd take a picture of it.
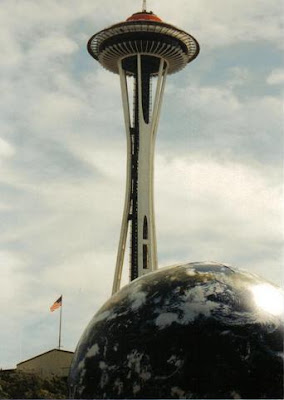
This picture of the Space Needle I snatched off of DeviantArt.com from another friend of mine in Seattle.
Alright so what I did is:
1.) Out of the 3 pictures, I chose the rain picture as my "base."
2.) The pictures of the hills I pressed the letter "V" to switch to the move tool and then dragged my hill photo onto my rain photo.
3.) Then I added a layer mask to my hills layer
4.) Then I pressed "G" to get the gradient tool up, and because I wanted to fade my picture, I chose the Gradient option "Foreground to Transparent" and did several gradients until I got the look that I was happy with.
5.) The picture of the Space Needle, I used the quick selection tool, and cut out the part of the space needle that I wanted and then copied and pasted it into the picture I am working on.
6.) Adjusted the opacity to 53% and the fill to 89%.
7.) Then I linear burned the Space Needle to make it a little brighter.
8.) Zoomed in on the space needle, and with the eraser, I erased the white between the space needle legs so that the picture of the trees showed through between the legs.
9.) On dafont.com, I downloaded "el&font BLOCK" font, and sized it to 200pt.
10.) Double clicking the layer of the text, pulling up Layer Style, I chose Outer and Inner Glow and changed the text color to #3c6179.
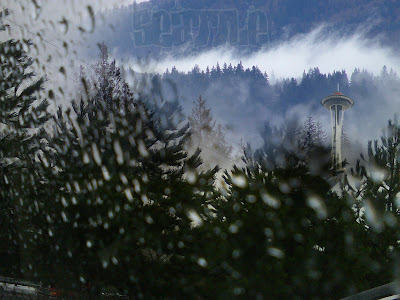
11.) I put the text "SEATTLE" up into the clouds and trees, blending it in to make it just kind of hit that it's there.
12.) There was a semi-truck or something in one of the pictures that was showing through in the bottom left hand corner, and same with the the right hand corner.... so I erased it at the opacity set at 61%.
13.) Last thing -- resize.
IMAGE -> IMAGE SIZE -> Width: 800 Height: 600 and saved as a JPEG.
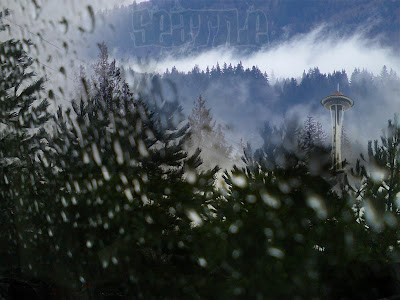
Here is the final product:
Whoop whoop it looks rad.